Sunday, February 26, 2017

N&B Retreat Wrapup

Project Parade

Maybe I just wasn't paying attention, but it seemed like more people were working on bits and pieces this year, rather than working on finishes, so I don't have much to show.

Donna did finish two other things while I was looking the other way -- yes, she works that fast -- but my favorite was Big and Bold (or was it Bold and Bright?).

A simple pattern that shows off feature prints really well. 


The lengths Donna will go to to get a good photo!

Frances made a quick quilt with black and white log cabins, then worked on the quilt I'm sure you've seen that looks like Breeko Blocks to me -- totally uncomfortable to sleep on ...


She likes graphic designs and her fabric choices really highlight the dimensional quality of the design.

Like me, Lisa brought a lot of projects that just needed finishing.  Most of them were done and down before I thought of getting the camera poised.  But this one was a stunner:  Chinese Magic.

Chinese Magic
One of our group who has since passed away made a quilt from this pattern and several S'mores decided this year to make one to honor Judy.

Connie whipped out this sweet baby quilt:


and Marsha worked on these sailboats:


My final project on Day 4 was a real moldie oldie:  Weaver Fever.

Weaver Fever
I started this at a retreat that pre-dates the 2010 flood that destroyed our retreat center.  The secret to success on this one is an accurate and consistent quarter inch seam which is difficult, though not impossible, to achieve when working on multiple machines.  I've decided to get all the blocks made and then find a measurement that will work on the majority before assembly.  I love the graphic nature of this design!

Sew that's it for Nuts and Bolts 2017.  We're scheduled for February 19, 2018; if you're in the area and want to attend, let me know.

5,000 steps without getting on a treadmill!

Handbell Workshop

Day two of the annual Baptist (we're Presbyterian) handbell workshop began at 8:30 Saturday morning.  In years past there have been as many as 20 choirs, but apparently handbells have waned in popularity because there were only six choirs this year -- 2 Presbyterian, 1 school, and 3 Baptist.


Since HPC did not field a complete choir, it was nice to know that the missing notes would be filled in from other choirs!

My spot -- 3 bells B and C (lower clef), 3 chimes, and 2 mallets, all in the space of my music stand: 


By noon I had logged over 5,000 steps on my Fitbit -- just standing and stepping in place!  It was an exhilarating day topped by a worship service where we performed the 4 pieces we had been learning.  (And I'm still humming all the melodies ... )


Saturday, February 25, 2017

OMG - February

How did I do?

My One Monthly Goal for February was to assemble a quilt top from bright orphan blocks.  I'm pleased to report that I finished the top this past Monday when I added the borders.

Spare Parts
I wrote about my process and progress here and here.

It was challenging, yet fun, and I'm really pleased with the final result.  It finished at 45" x 56" and used up over 35 orphan blocks.

Also on Monday I wrapped up the last unfinished item of my January OMG -- putting borders on Holiday Frost.

Holiday Frost
This one was inspired by a quilt in M'Liss Rae Hawley's book, Fat Quarter Quilts.  I can't give you the finished size because I have already handed it off to a friend who offered to quilt it for me in exchange for some fabric I passed on to her several months ago. Win-win!

I am dutifully reporting in with Patty D at Elm Street Quilts.


Wednesday, February 22, 2017

Get Ready ... Wait ... Wait! ...

FLIMSY'S DONE!

Geese Migration
Design by Cynthia Brunz (Quilting is More Fun Than Housework).

Fabric collection begun 2014, mostly Daiwabo supplemented by taupe-like prints from stash.
Blocks begun November 24, 2015.
Blocks Finished November 2016.
Layout and construction begun January 2017.
Final top assembly February 22, 2017.

The sum total of my day's work at N&B Retreat! Looks even better in person. If I weren't at a church camp, I'd celebrate with a glass of wine.  Oh, well, I'll still sleep well tonight.


N&B Days One and Two

Nuts & Bolts

It's a long (and not very kind) story about how this retreat became known as Nuts and Bolts, so I will spare you the details -- except someone ate all the crust off the peach cobbler ... (and wasn't invited back) ...

I headed out early on Monday and after a brief stop at Whittle's for some backs, it was on to Loucon Training and Conference Center near Leitchfield, KY. I like to use retreats to finish up projects where I have plenty of space to properly measure for borders and backs. So that's where I began -- with the inner and outer borders for Zagnuts.
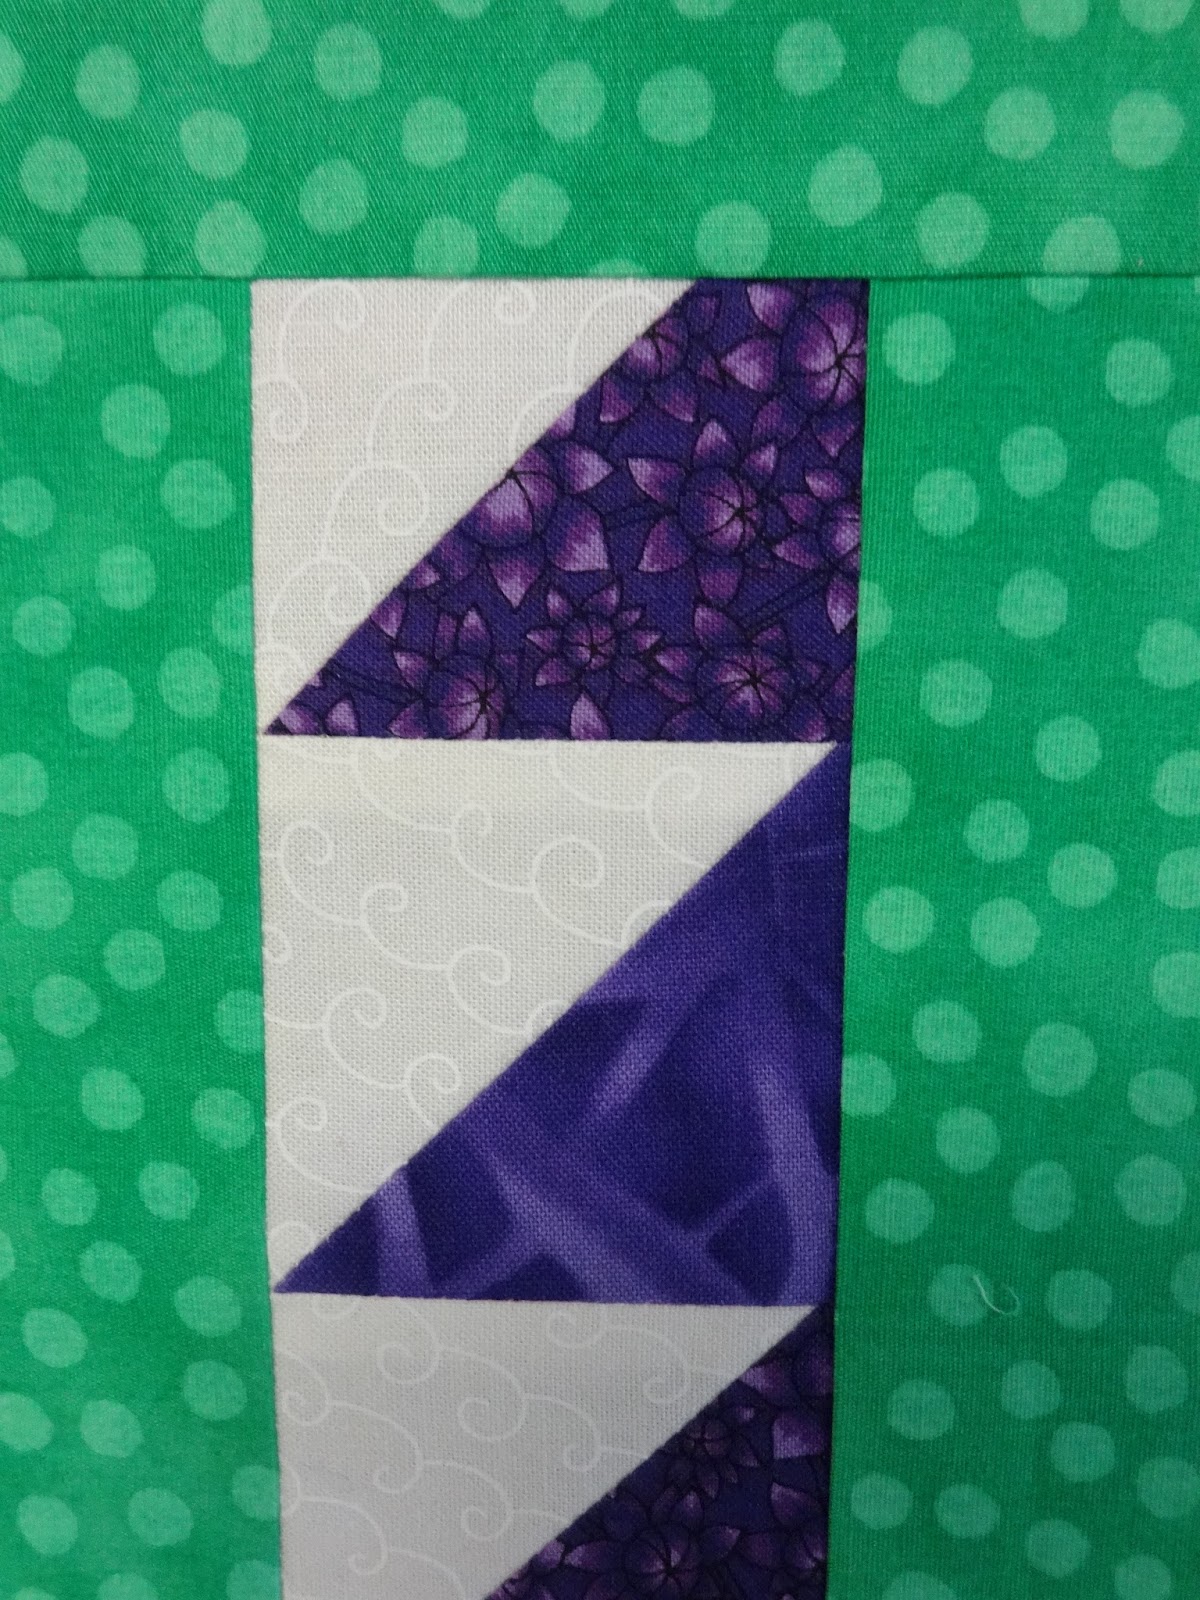
Zagnuts
I'm not thrilled with my border choice, but it was already cut and I was here, and WTH, just GO with it! So I did.  Look at the gorgeous floors in this room.  They've been down for at least three years and still show no signs of wear.

Next was the back for Zagnuts, one of the pieces I got at Whittle's.

Zagnut Back
I hope there's a little girl out there somewhere who loves purple!!!

Next I cut borders for Holiday Frost.  But it was getting late in the day and I didn't trust myself to get them on right so I cut the back for it from a wide back from Whittles and sewed the borders on first thing Tuesday.

Holiday Frost
I spent the remainder of Monday night making the back for Star Gazing out of the aqua blue/red berries print, another Whittle's purchase.

Star Gazing with back
The measurements I had taken with me were apparently written down before the borders were added so in the end I only had a sliver left.  I think I'll stop and get more on may way home because I REALLY love that fabric.

As I said, Tuesday began with borders on Holiday Frost.  Then I moved on to borders for Spare Parts Bright.

Spare Parts
Nothing on hand for the back, but I did make the binding out of this piece.

Spare Parts Binding
Next up, borders on this wheelchair quilt made out of leftovers from Trellis Garden.

Wheelchair Quilt
That took care of all the loose ends and provided a great sense of accomplishment.  I finished the day by putting Geese Migration up on the design wall and attempting assembly.

Geese Migration
I'll begin today ripping out what I messed up yesterday -- one row of blocks turned "wrong" (tho who would notice but me) and two setting triangles stitched before the sashing was added.  My tip for the day:  If you have to spread a project out over a long period of time, try to use the same machine and make notes on where your needle is set.  It also helps if you square up your blocks before assembly.  Make lots of notes and READ them!  You can guess how I know this.

So Day Three begins Bloggin' and Froggin'!  After a shower, that is.

PS: WiFi connection here is spotty, at best, so I'll try to catch up on comments, both incoming and outgoing, once I get home.


Sunday, February 19, 2017

Pantry Challenge Update

I raided my "Adopt Me!' box


Pantry  Challenge blocks
This is an early photo of the miscellaneous orphan blocks I'm trying to fit into a single quilt.  I wrote about my progress to date and how my son prompted the quilt name here.

I have begun combining pieces into 10" blocks, but I felt Pantry Challenge needed some places where the eyes could rest so I pulled some project leftovers out of my "Adopt Me!" box that were more on the neutral side.


I think I need to get a bit further along before I make a final decision on the arrangement.

This project will have to mellow on my wall this week while I'm at the Nuts and Bolts retreat. I need to be close to resources when I work on this so I'll use my retreat time to get borders on several projects and maybe finish up a couple of moldie oldies.

Have a great week, y'all!

Be sure to visit Quilting is More Fun Than Housework to see how others are using up their scraps.


Saturday, February 18, 2017

A New Adventure

Round Robin

I've long wanted to participate in a round robin and my opportunity has finally arrived!

Music City Modern Quilters decided to offer voluntary participation in a round robin this year and 12 of us jumped at the chance.  For convenience, we divided into two groups of 6.  Each person makes a starting block, then passes it on to the next name on the list.  Each person can add plain or pieced borders, maybe all around or maybe off center. Each month we pass what we worked on to the next name on the list and in July we'll have a top of some size.

This is the block I made.  The plain squares are really white -- Kona Snow -- I just can't adjust the color enough. 

Rolling 9-Patch
The block is called Rolling 9-Patch; it finishes at 10".  While it is a traditional block, I think it has a very modern vibe.  I am including the background print in my kit for color inspiration, but it's also available to be used along the way.

This is the block that was passed on to me.


I've already pulled some fabrics that I think will complement it. Now to decide what to do.  I'm already thrown off because I anticipated that I might set the block on point!  Maybe I could pass it on and say I'm done .... No, I couldn't do that.  Maybe some flying geese?  The challenge here is trying to know the maker while letting your own muse take control.  It will certainly be interesting to see what we all get back in July.


Friday, February 17, 2017

When the Stars Align

Serendipity Happens

Maybe it was this sunset, rather than the stars.


Don't ya love it when things just seem to fall into place for you?

I had 3 things on my agenda yesterday:
  1. Pull a fabric collection for a new quilt block (more on that Saturday)
  2. Find notes on paper foundation piecing with freezer paper to prep for a demo
  3. Continue thinking about the Fabric Pantry Challenge project.
I began the morning assembling 6 -- or was it 7 -- groups of fabric that could be the base for a new quilt design.  Problem was, I didn't have a design in mind, so I spent an hour searching for a block in 501 Rotary-Cut Quilt Blocks by Judy Hopkins.  All the while I kept trying to visualize where in my messy world those notes from a Judy Mathieson class might be hiding.

A couple of my collections needed pinks of various shades.  I noticed some pinks deep in one of my project boxes that happened to contain my three attempts at Mariner's Compass blocks, one of which was constructed at the knee of -- get this! -- Judy Mathieson!!


Shur nuff, the notes were in the box!


I took a few minutes to peruse through the book and look what I found:


Look familiar?  Apparently, that is what I had in mind when I made these blocks.

What a great day, capped off by dinner with friends!

Linking with Confessions of a Fabric Addict.

Wednesday, February 15, 2017

Pantry Challenge

Oh, Wait ...

... that's just between my son and me.  We've been trying to clean the old wood out of our freezers and pantries.  This morning he writes, "Been enjoying your 'spare parts' series on your blog, which is kind of like the pantry challenge but for fabric!"

I like that analogy, don't you?

Well, my current fabric pantry challenge project is starting to gel.  I added a few more blocks to the mix after taking this photo and began thinking about my approach.


After a bit of deconstruction, I thought about grouping like items together ...


... but I really couldn't see how I could make this work with sizes ranging from 3" to 12".  Since the most common denominator turned out to be 10", or so I thought, -- more on that later -- I decided to work with a 10" grid, spacing out the 10" blocks and filling in with 10" blocks constructed of smaller bits.

While sitting in the car shop waiting room yesterday (BTW, the tire pressure light is finally OFF!), I came up with these schemes, different ways to combine disparate pieces into a 10" square.


I could hardly wait to get home and give this idea a try.  Since I had only one 5" block, I started with that one surrounded by 2-1/2" HSTs.


When I give a size, I'm referring to the finished size.  Which is one of the reasons I'm having so many math problems -- I forget if I should add or subtract the 1/2"!  Maybe by the time this one is finished I will have finally caught on to my own method ...

I thought the quilt might need a break between all the HSTs so I added a plain neutral border to these two  7-1/2" leaves.


I'm not sure I like this, but will leave them as is for now until I'm ready to put everything together.  I next took one of the smaller 4-1/2" blocks and, following my scheme, I made another 10" unit.


First I framed the leaf to make it 6". The small bricks measure 4" x 6" with a 4" combination triangle (a/k/a Mary's triangle) in the lower right corner. 

This grid concept appeals to my sense of order, but I'm not sure the mix of colors and angles will be pleasing when I get everything together.  Nevertheless, I will press on and see if some of the neutral blocks in the collection will provide enough separation.  There's always the option of sashing, too.

That's my progress as of Wednesday afternoon.  Stay tuned!


Monday, February 13, 2017

More Spare Parts

I've made some Rainbow Scrap Challenge blocks, 
I've almost finished my One Monthly Goal,
and it's only the second full week of February!

However, I doubt much sewing will happen this week -- the car needs to go to the shop AGAIN (tire pressure sensor malfunction still not fixed), some Spring cleaning needs to be done, and meals need to be planned and prepped because the following week is the Nuts and Bolts Retreat in Kentucky!

In between loads of laundry on Sunday, I managed to sew twosie rows of these bricks.

Bricks
The bricks are 2-1/2" x 4-1/2", cut from old scraps several years ago. Time to get them out of the box and into something useful. 

With the bricks off the wall, I threw up some of my "warm" collection of spare parts. 

Warm Spare Parts
I see a lot of them are variations of a maple leaf; maybe there's a theme there. The top three are hand-pieced, dating back to my earliest quilting adventures circa 2001-2. The two gold ones in the center are a block I designed based on a ceiling in a cruise ship lounge.  The bottom left leaf is the top corner of Third Week in October," one that will never get finished!

What has me flummoxed, though, are the blocks on the right -- the ones with the big white square on point surrounded by HSTs.  I have absolutely NO recollection of making these, yet I recognize the fabrics.  The white squares look out of place with the warm tones so I figure I'll be taking these blocks apart.  I'm open to suggestions for what to do with a large collection of medium value HSTs (this is only part of them).

Sew, that's my design wall this week.  Linking with Patchwork Times.

Saturday, February 11, 2017

Spare Parts

The Saga Continues

I had great hopes I would have Spare Parts finished by Friday.  NOT.

I last left you with this ...


...  I was contemplating should I add some weightier blocks on the lower right to balance the upper left when The Joyful Quilter suggested using my pinwheels on the LEFT to balance the light.  Thank you Joyful!


I needed to add another round of spacer strips but ran into some issues with squareness that involved revising a few seam allowances.  And the pinwheels needed to be trimmed down a bit to fit.  And I needed to make a few more to go across the top ...


But now I'm counting it done!  Except for borders, which will go on next week.  I've chosen this fabric which has all the colors in it.


It will be a nice sized snuggle quilt that some kid -- or any adult for that matter -- will love.

Linking up with Quilting is More Fun Than Housework.


Wednesday, February 8, 2017

Sometimes a Girl's Gotta Do ...

What a girl's gotta do

What's the point?
As fun as this Spare Parts project is, the math is driving me crazy!!!  I measure, break out the calculator, ask my architect husband, and I still can't get it right!  Either I forget to add in the 1/2" for seams, or I forget that the 1/2" is already included in the measurement. But this is supposed to be improvisational, after all, so I did what quilters have done for ages -- just cut the dang thing off!

When I left you last, I was contemplating adding the card tricks at the bottom and considering changing the spacer strips to black since the pinwheels already had a black strip attached.


In the end I felt the black was too heavy compared to the fresh green I had been using. I also ditched the pinwheels at this point because I had so many angles going.  But I did add the card tricks after trimming and reversing the location.


I thought this might be a good time to add a large collection of bright 4-patches.


Jan at The Colorful Fabriholic suggested I rotate a photo to see if I have balance and I can now see that if I use the 4Ps on this round, I will need to add some weight in the next to balance heavier blocks already on the outside edge.  The few blocks I have left are some of the larger ones, but I don't have enough for an entire round  so I may have to dig for more blocks ... or make some ...

Stay tuned to my Spare Parts Saga.

Monday, February 6, 2017

DWM - So Much Fun!

Spare Parts

Pulling together a bunch of non-related orphan blocks is definitely a challenge, but a challenge I wanted to take.  I began with this collection of bright orphans.

Spare Parts
I left them on my design wall for several days.  My first idea was to do a medallion style, but nothing was working for me.  I tried a row arrangement which was boring. Then I saw that several other people had done an off-center arrangement and that concept appealed to me. So I started with these four monochromatic 9-patches.

Step 1
Next I added a collection of HSTs which I had to trim down to fit. 

Step 2
Then I added a separator strip and a group of Wonky Stars, again trimmed to fit the space.

Step 3
I am considering adding the two card trick blocks below this to extend it into more of a rectangle.


I discovered the pinwheels in another box of bright bits today. If I use them I will probably replace the second green separator strip with black. I'm going to let it marinate overnight and will review it in the morning.

This is SO much fun!!