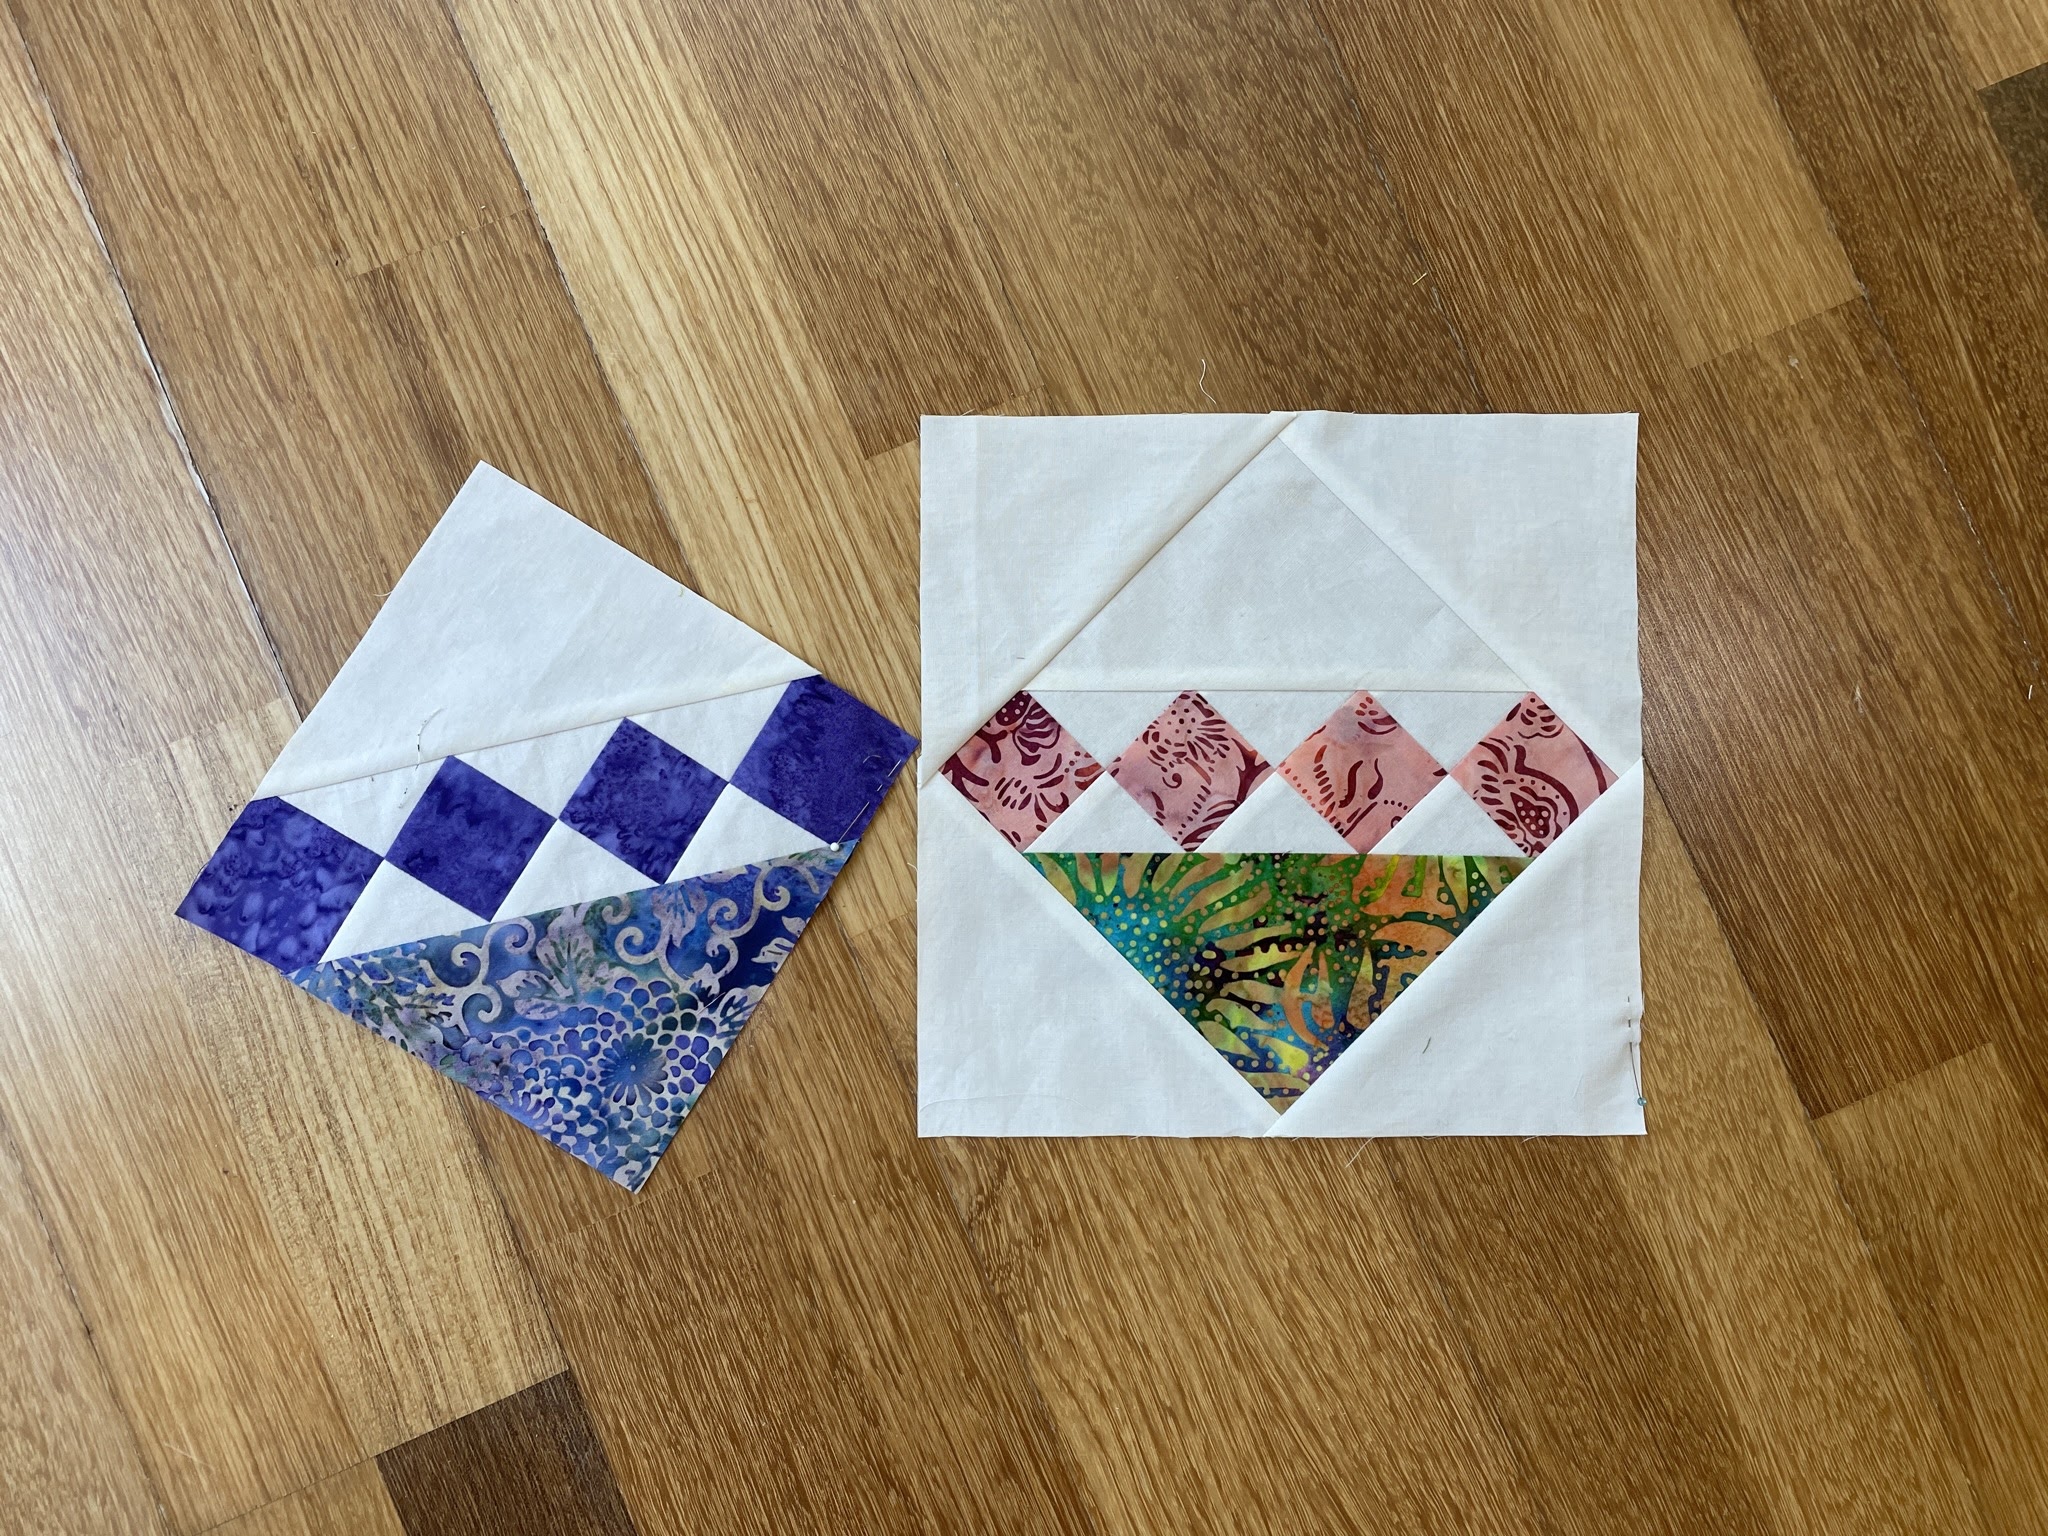
Not long ago I wrote about one of those "drop everything" projects, the pattern for which I had purchased at the Pigeon Forge Mountain Quiltfest. The pattern is Zinnia, by Laundry Basket Quilts (Edyta Sitar). My plan is to make it my major project at a retreat next week, so I have been diligently cutting, prepping, practicing, thinking ... well, you get the idea that I've been pretty much obsessed with it for over a week. I finally have a practice block to show for my efforts.

Jocelyn the Canadian Needle Nanna incorrectly assumed I was improvising, recreating the pattern by looking at the picture. While I have been known to do that with traditional blocks, this one is far more complex than I want to recreate, so let me explain. The pattern is designed around a Laundry Basket Quilts layer cake collection of prints for the colorful parts. I'm not using those and I'm not going to cut my fabric into 10" squares just to cut them into smaller pieces!
The first obstacle I had was converting cutting instructions to fit the scraps of colorful batiks I wanted to use. I started by "kitting" up 25 blooms along with the corner background triangles. Easy enough as I only needed four 2" squares and one large triangle of color.
Then it was on to cutting the background pieces -- one WHOLE page of cutting instructions! (I would include a picture of the page but that might infringe on copyright.) I am labeling each group so that I don't accidentally put the wrong piece in the wrong place.

I finally had the majority of pieces cut and packaged. My big dilemma, however, was the large leaf. The directions call for cutting half-square triangles from a 5" green square, combining two values to make a large triangle square, then adding small background flip corners.


This is going to be a GREAT project! Love the colors you chose and the block really speaks to me. Can't wait to see the progress! Have fun at the retreat!
ReplyDeletevery pretty but it looks like it took awhile to get it kitted up
ReplyDeleteKitting up all those blocks is quite the project! I bet you'll appreciate having that taken care of when you get to your retreat, though. I love how you've figured out the block construction that works for you and your stash! (Why do you despise stitch and flip corners? Just curious!)
ReplyDelete