Saturday, June 28, 2014

On The Road Again

Three Little S'mores went to Owensboro on Friday.   We met four more there.

"Who are the S'mores?", you ask.  In some areas you might call us a bee.  We are 20 strong.  Sisters I never had, BFFs, sewing assistants, and critical supporters.

"Why are you called S'mores?", you inquire.  Because when we're together we want to sew s'more, laugh s'more, eat s'more, and buy s'more fabric.

"Why Owensboro?", you ask yet again.  Because three of our S'mores live in northern Kentucky and southern Indiana. They belong to the Owensboro Area Quilt Guild and their biannual quilt show started Friday and continued through Saturday.

OAQG Show 2014
For a guild show it was very professionally presented.  The area on the bottom left was for lectures and demonstrations.  Bottom right and right aisle were a nice variety of vendors.  And at least 350 quilts were hanging.  Including two of mine!!

Fall Color Cruise (a/k/a BQ)

Rock Island, Rock On (a/k/a Rock Island Campfires)
And quilts by other S'mores.

Material Girls in bright plaids by Nancy R

Celtic Solstice in CW colors by Lisa B

Bright Stars by Sharon B

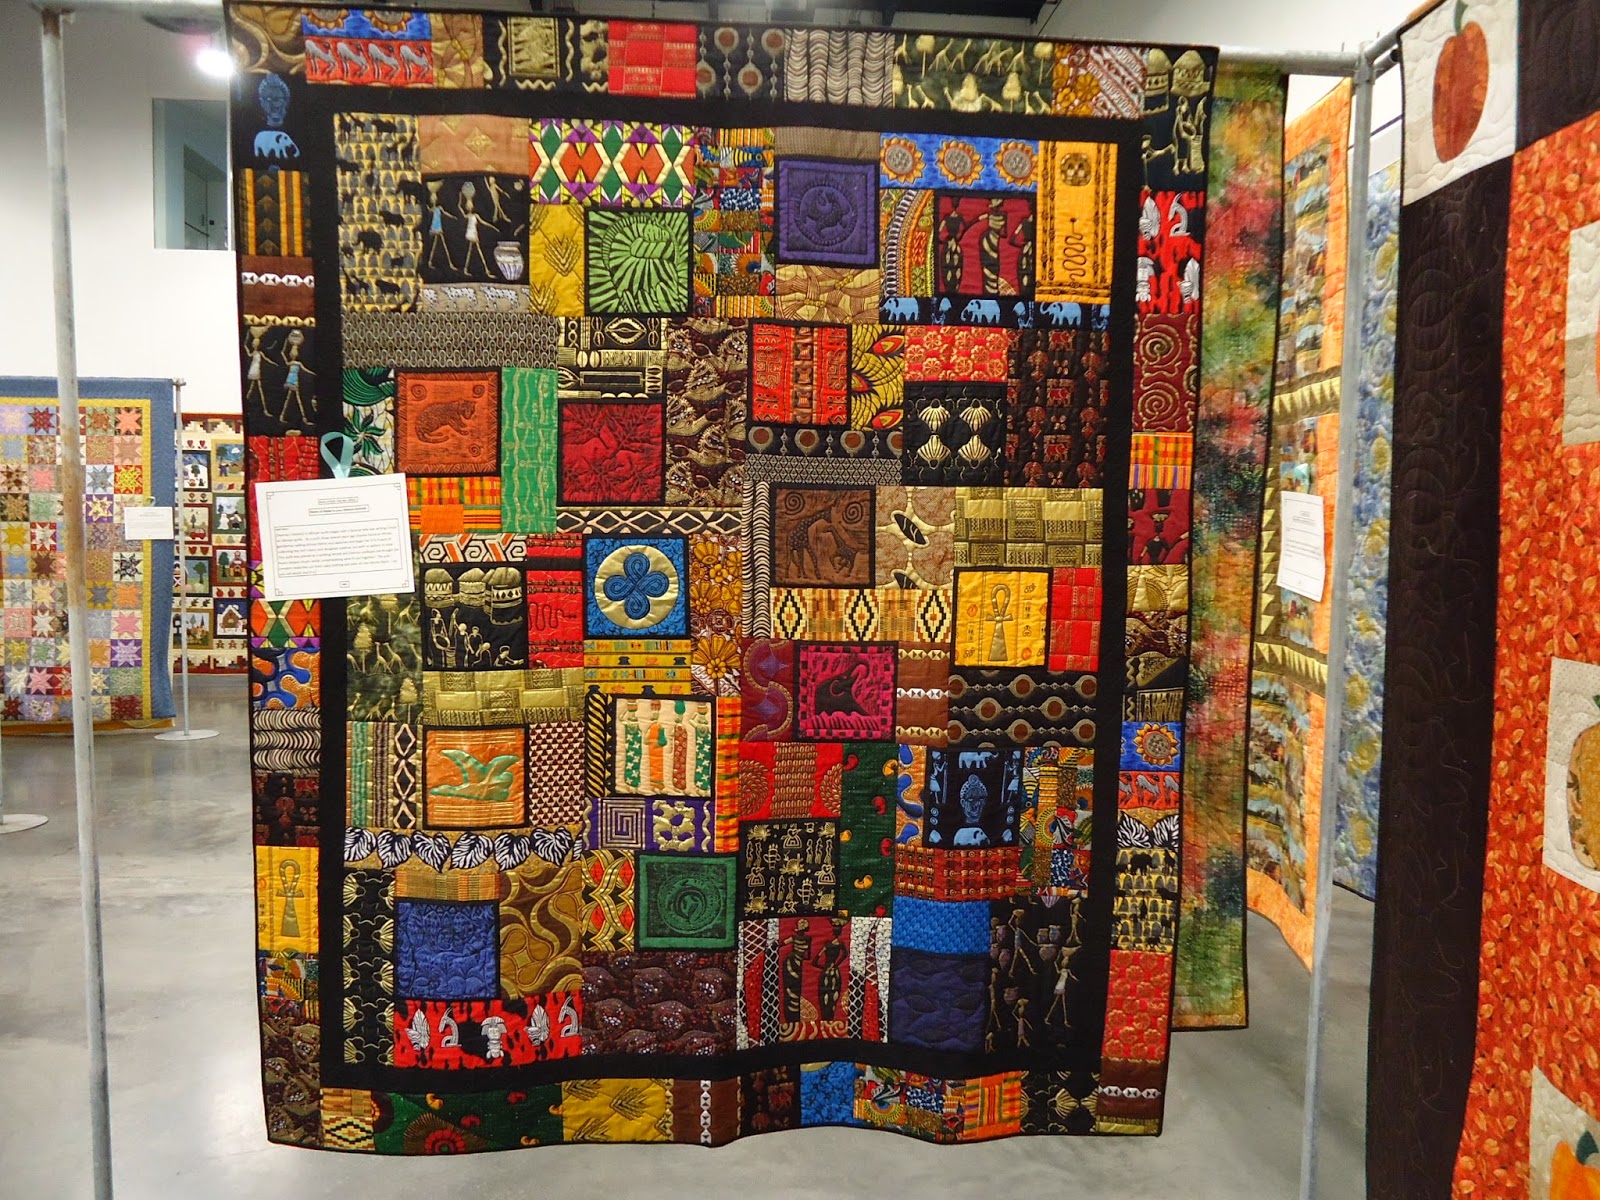
Africa by Deanna K
There were others by Lisa and Deanna, as well.  Sorry, Rita, I forgot to get a picture of yours ;-(

Mr. Whittle was vending.  I shopped with the sole purpose of getting a back for French Braid.  So I came home with 3 yards of 108" backing fabric to add to my stash report.  I also bought a spool of Aurifil at a great price from another vendor.

All-in-all, it was a lovely day with lovely friends.

Stash report this week:
     In this Week:            9.0 yards
     In year to Date:      166.25 yards
     Out this Week:           0.0 yards (.5 binding, 2.5 give-away)
     Out Year-to-Date:    130 yards
     Net Used 2014      -36.25 yards

See how others measure up at Patchwork Times.

Tuesday, June 24, 2014

No-Tip Tuesday

Actually, No-Time for a Tip on Tuesday.

As I work, I'm always thinking about the way I do things -- is it easier, does it make sense, could it help a newbie, am I the only one... While a couple of tips have been mulling around in my mind, I haven't had time to take pictures.  Visits from family trump blogging any day.  What can I say?

I'm linking up with Connie at Freemotion on the River today to show my progress on Mary's Triangles before it outgrows my design wall (and before y'all get totally tired of hearing about MT).

[Oh, here's a tip:  Use a flannel-backed plastic tablecloth as a design wall.  But you probably knew that already.  Next Tuesday I'll show you a non-destructive way to hang one and other neat things to do with them, so stay tuned!]

Anyway, I have decided to group the blocks by triangle color since I had several fabrics in my starting group that were in coordinating colorways.  And also because my brain just requires a semblance of organization, even in a scrappy quilt.  I can't help it.  It's me.

MT as of 6/24


Since last reporting I have added a round of rusty rose triangles.  Rather than continuing with this scheme for the rest of the quilt, I am considering some different settings for the corners.  The beauty of MT is the variety of setting options.  Basically, anything that works for HSTs or log cabins will work for MT.  Judy Martin's log cabin books have been a great inspiration.

I'm hoping to get the center rows together this week as I think this is as wide as it will be.

Thanks for visiting today.  And come back soon.


Monday, June 23, 2014

MT Monday

MT ... not empty, but M T for Mary's Triangles.

Progress so far.

MT so far .....

Not sewn together yet;  I can still change things around, but I'm pretty happy with what I have up there.  The picture doesn't do it justice.  The accent squares really sparkle.

Current plan is to alternate medium and dark rounds.  Since I started with a roll of 5-1/2" strips from a Thimbleberries collection, I have a lot of similar colors so I'm trying to keep the like colors together.  The outer rounds might be a little more varied.  Or I might do something different in the corners.

Stay tuned ....

In the meantime, check out other design walls at Patchwork Times.


Sunday, June 22, 2014

A Day with the Bugs

For the record, nothing in this week and one yard used to make sleeves for two quilts.  But since they are temporary sleeves and the fabric will be recycled back into my stash at some point, I am not going to count it out.  Now to remember this when that time comes .....

It's not that I have not been sewing.  In fact, I've set myself a goal of at least 20 Mary's Triangles each day.  Some days I've made more.  The quilt is coming along nicely now that I have settled on a setting with a star in the center.  I'll post my progress tomorrow.

But my Main Man was out of town most of the week and the grandkids arrived on Wednesday.  Not much time for sewing, and that's OK.

After Glow-in-the-dark Friday ...


Glow Golf

... we had a Sedate Saturday.  CG and I headed over to Cheekwood Botanical Gardens to see giant bug sculptures nestled among the plants and flowers.  All were made from wood, primarily willow and red cedar -- scary and lovely at the same time. CG is a born naturalist and she especially looked forward to seeing the dragonfly and the assassin bug.

Dragonfly

Assassin Bug

(We had to google "assassin bug" later to make sure we don't have to be watching out for them here!)

My favorite was the praying mantis.  Did you know the plural of mantis is mantids?  I didn't.

Praying Mantis


There were interactive areas, as well -- the butterfly and the hive.

Greetings from The Hive

And an amazing sculpture of nothing but intertwined twigs.

Twig Sculpture
We in Nashville are so fortunate to have a place like Cheekwood in our midst.  I'll admit, it's been a while since I had visited -- which is silly since we now live about 3 miles from there.  The gardens are magnificent, full of winding walks and water features, something always in bloom.  I paid for an annual membership and plan to go back frequently to walk.

Two hours of hiking the trails through sun and shade, uphill and down, and I was wasted so CG and I came home for lunch.  Son2 and AA were not far behind.  Son1 joined us for dinner. 

A spirited game of Phase 10, fix-it-yourself personal pizzas, and a raucous game of Farkle rounded out our day.  All the while World Cup soccer, golf, and CWS baseball (GO VANDY!!) going in the background.  This family loves its games!

Calm has fallen on the household once again.  I won't know how to act!

Linking up with Patchwork Times.


Saturday, June 21, 2014

Glow-in-the-dark Friday

Kids!  What ever happened to Lincoln Logs and hide and seek?   Today it seems a thing has to be electronic or glow in the dark to be fun.

So yesterday we were off to Glow-Golf.

AA and CG contemplate their next putt

Gotta admit, it was fun.  Though I was a bit concerned about this old lady tripping in the dark.  However, I wasn't brave enough (or limber enough) to try out the Laser Maze.

AA makes his way through the Laser Maze (or is it CG?)


They both did very well avoiding the laser lines.  Son#2 and I watched it unfold on a video monitor.

We wrapped up the day with a 3-month game of Pay Day.

Main Man took my place while I prepared supper

I'm ready for Bugs today.  Stay tuned.......

Thursday, June 19, 2014

What I did Wednesday

I was able to give these kids a real hug and spend some quality time with them over a game of Kings in the Corner after dinner.

CG amd AA waiting for dinner
They will have time with Uncle Brian and Aunt Sherry today after a trip to the wave pool.  Can't wait to see what's on the agenda for Friday.  More games, I'm sure!

Tuesday, June 17, 2014

A Tip for Tuesday

Allow space for the pole 
when adding sleeves for quilt shows

At most quilt shows the requirement is for a 4-inch sleeve to be attached to the top of the quilt.  And in many cases that full 4 inches is needed, especially if PVC piping is used.  In those cases, though, if you have stitched the sleeve flat to the quilt the top edge of the quilt will be distorted by the pole.

I have discovered that adding a tuck in the sleeve relieves that distortion. Generally, if I fold the sleeve up to the edge of the binding, that is sufficient.

I happened to be adding sleeves to a couple of quilts today so I took some quick photos.  I hope you can see what I did.

Fold sleeve up to the edge of the binding and clip

You may notice that I have basted the sleeve to the binding because it is temporary.  When I know in advance that I want a permanent sleeve, I would stitch it in when applying the binding.  I also make my sleeves from a tube to protect the back fabric.

Then pin the bottom edge of the sleeve before whipping into place

That little bit -- no more than 1/2 inch of "give" -- makes a world of difference in how the quilt hangs from a pole like those supplied by display companies.

I'll do my best to get a photo of these quilts hanging in a couple of weeks so you can see what I mean.


Monday, June 16, 2014

More Fun With Mary's Triangles

My design wall is an indication of my preoccupation this past week -- Mary's Triangles.  As I said yesterday, my intention was to make this a leader-ender project.  Yeah, right!   I now have the combo units made and paired with the large rectangles -- enough for 160 blocks, 42 of which are already made!

Mary's Triangles

How did that happen?  I've just slapped them up on the wall as I finished them.  I think I will isolate the medium triangles into rounds of their own, but I can't be sure until I know how many medium and dark triangles I have.  I also see I have a lot of yellow accent squares -- might be time to dig into my 2-1/2" strips ......

At the end of the my tutorial I mentioned that the accent squares could be replaced with half-square triangles for a more complex look.  Imagine my delight when Bonnie Hunter provided an illustration of that on her blog Quiltville's Quips & Snips the next morning!  Take a look.

Bonnie Hunter showing Yellow Fish Rule

I don't know how she made them (or if she was the one who made them, for that matter), but those fish are Mary's Triangles!!  Aren't they fun??

If you missed my tutorial for Mary's Triangles, you can read it here.


Bop on over to Patchwork Times to see what everyone else is working on this week.


Sunday, June 15, 2014

Week in Review

My week got off to a rocky start -- under-sleeping, printer woes -- but improved greatly as the week progressed.  Nevertheless, no finishes to bring my stash numbers back into focus.  Nothing in, nothing out.

Most of the sewing this week was devoted to working up samples of Mary's Triangles for a tutorial I posted on Wednesday (and updated yesterday and today).  As frequently happens, little tasks inspire me for greater things.  So now I have a pile of pieces, though intended to be leaders and enders, which have morphed into pieces and parts for a whole quilt of Mary's Triangles.

New nearly- FO - Mary's Triangles


Does this ever happen to you?  I've tried doing the leader-ender thing, but I get antsy to see what things will look like and kinda get in a rhythm of chain piecing and the next thing I know all the pieces are made!  Obviously, I have no self control ;p !!

The rest of my sewing time this week was devoted to turning bindings on three quilts, two of which will appear in the Greater Owensboro Quilt Guild show in a couple of weeks.  I'll post pictures from the show.  I still need to make the sleeves and that will give me some fabric usage.

Main Man is on the road again, so little sewing will get done next week other than the sleeves.  Grandkids arrive on Wednesday; they're on their own Thursday till Grandpa gets back, then we'll plan some fun things for Friday and Saturday.  At a minimum there will be a lot of games.  Wish we lived closer .....


Friday, June 13, 2014

Something to Celebrate

Today I'll be linking up with Sarah at Confessions of a Fabric Addict for her Whoop-Whoop Friday because I have something to celebrate!

On Wednesday I wrote my first tutorial:  "Fun with Mary's Triangles".

Mary's Triangles

Mary's Triangles (so-named by quilt author Sally Schneider) are "group-project friendly" because they can be trimmed down to a consistent size without losing any detail.  And "scrap friendly", too.  Both are things that folks working on comfort quilts like to hear.

While my photos could be a little better, I think I did OK.  I'd love for you to try it and give me some feedback.  Please check it out here.

Have a great weekend.  And hug all the fathers.

PS:  I've been working out alternate sizes in my head, but need to check the measurements in real-time before I publish the numbers.  Updated tutorial 6/14 to include new numbers.

Wednesday, June 11, 2014

Fun with Mary's Triangles - A Tutorial

Sally Schneider, author of Scrap Mania and several other books on managing your scraps, came up with an easy method to make these composite triangle squares that she calls Mary's Triangles (it's a long story ....).


Mary's Triangles

I'm sure others have come up with a similar concept for different sizes, but this is where I learned it and the size I use.  These blocks finish at 4 inches and are constructed with 1/4" seams.

Updated 6/14/14 to include additional sizes.  Cutting for 5" and 6" blocks, respectively, in parentheses.

To make two blocks you will need to cut:

  • two accent squares 2-1/2" (3", 3-1/2"),
  • two light rectangles 2-1/2" x 3-1/2" (3" x 4", 3-1/2" x 4-1/2"), and 
  • one dark rectangle 4-1/2" x 5-1/2" (5-1/2" x 6-1/2", 6-1/2" x 7-1/2").


Enough for 2 finished squares

Begin by sewing the accent squares to the short side of the light rectangles.  Press toward the accent square (I finger press).  These units should measure 2-1/2" x 5-1/2".  Position the two units, right sides together (RST), with the accent squares on opposite ends.

Accent square sewn to light rectangle

Stitch along one of the long sides, feeding the accent square end under the presser foot first or your units won't look like mine (ask me how I know ;-} ).  Clip the seam about halfway between the two accent squares. Don't be afraid of clipping too close to the seam because it will be cut away. Press away from the squares (I use the iron at this point).  This unit should measure 4-1/2" x 5-1/2" .


Seam clipped and pressed away from the squares

Note:  Sally suggests creating a plastic template triangle to mark the stitching line, but I have found either a right triangle ruler or a ruler with a 45-degree angle line will work.  (My illustrations are right-handed; hopefully lefties will know how to adapt.)


Position the right triangle ruler so that the base of the triangle is aligned with the bottom of the pieced unit and the point all the way to the corner.  The angled edge of the ruler should fall on the seam intersection.  If it doesn't, adjust the position so that it does and draw a line.

Line drawn -- should have been a little more to the left!


Or use any ruler with a 45-degree line positioned along the bottom edge of the unit.  The ruler needs to be long enough to extend to the corner and the edge should fall on the seam intersection; if it doesn't adjust accordingly.


Turn the unit around and repeat on the other side.


Place this unit on top of the 4-1/2" x 5-1/2" dark rectangle, RST.


Stitch just to the left of the drawn lines, trying to be about a thread's width outside the seam intersection.  Cut apart between the stitching lines.  This seam will be slightly larger than 1/4".


Press toward the dark triangle.  Trim if necessary; however, if you have stitched accurately all you should need to do is snip the one dog-ear.  These blocks should measure 4-1/2" unfinished.

Finished blocks


Mary's Triangles can replace half-square triangles in any setting -- furrows, sunlight and shadow, diamond, etc.  Also, the accent square can be replaced with a 2-1/2" half-square triangle for a more complex look.

I hope you will give this a try.  And be sure to let me know how you do!


Tuesday, June 10, 2014

A Tip for Tuesday


Don't overlook the office supply store as a 
source for quilty gadgets.

Here are a few examples:

Pencil Holders

Both of these gadgets are for holding pencils at a computer station.  I will say the blue knobby thing doesn't hold much more than a pencil, but it's so nice to have a pencil at hand to make a quick note about what you are doing or to draw that line on a square -- you know the ones.

The green thing is soft and flexible so it will hold a seam ripper.  I have one on my travel machine to hold a small pair of scissors.  And I have one on my tablet to hold the stylus.

The office supply store is a great source for storage containers.  I absolutely can't function without these "Really Useful Boxes" (truly, that's what they are called) in all sizes.  

Really Useful Box

The small ones are great for pins, bobbins, and clips.  


The latches keep the lids on to prevent spilling.


And they stack!  and come in such fun colors.

So visit an office supply store and see what you can repurpose for quilting.  You may find the prices better there, too.  Just sayin' ....

Have a great Tuesday!

Monday, June 9, 2014

Another Rainy Monday

It's Monday.  It's raining.  And it's guild meeting day.

First, I misread the alarm clock, thought I had overslept, and rushed down to the kitchen at 5:30!  No coffee waiting for me. :-(  OK, I'll admit I'm spoiled.  Back in my working days my Main Man would bring the first cup to me in bed.  Sigh ....

So I headed down to the computer to write up instructions for today's guild program.  Just one block ... how hard can that be?

Well, harder than I thought.  Especially since my printer is on the second floor and I'm in the basement.  Rather than run up and down two flights of stairs to turn on the printer and then back up and down only to find out WiFi couldn't broadcast that far, I had the bright idea to e-mail it as an attachment to myself and I could receive it on MM's computer in the basement and print there.  Not to be.  E-mail didn't like something in the document, wouldn't attach.

Did I say it's Monday?  And it's raining.  Why do I always wait till the last minute?????  I ended up copying the text into a message and was able to print that.

So what am I working on otherwise?  Today at guild sit-n-sew I will be turning the binding on Rock Island, Rock On (a/k/a Rock Island Campfires).

Rock Island, Rock On
As I was sewing the binding strips together I was reminded of a tip I got in a class -- I think it was Susan Cleveland (Piping Hot Curves).  So I thought I'd share it with you.

Binding strips RST at right angles
You probably know that the seams on binding strips should be on the diagonal to reduce bulk.  This is accomplished by putting strips right sides together at right angles to each other.  Then stitching diagonally across the intersection.

But do you have trouble remembering which way to sew?

Think about the strips as the legs in a pair of pants.  Got the picture?

ALWAYS stitch along the waistline, NEVER through the crotch!

Now that I have your attention ..... notice that I do not pin.  I have a line drawn on the table insert that marks the center needle position.  I simply guide the notch where the strips overlap along the line.....


Stitching along the "waistline" using drawn line as guide
... then pull the unsewn end of the top strip face up and lay the next strip on top ...

Chain piecing binding strips together
... chaining till I have them all together.

Hope your Monday got off to a better start than mine.  Check out what others are working on at Patchwork Times.

Sunday, June 8, 2014

Scrappy Sunday

What a week!  It's so nice to have an extended obligation-free period of time to concentrate on some much-needed reorganization.  If you missed my Adventures in Cleaning, just scroll back through the last week of posts. 

I'm not finished, by a long shot.  In fact, I've progressed to the move-messy stacks-from-place-to-place stage, expanding into the Other Half's territory.  Which probably means that some things need to go.  Out.  Away.  Never to return.  That's what this week is for ......

In the meantime, the cutting table is finally clear.

I


The sewing table is finally clear.

Ready to sew binding on Rock Island, Rock On

Yesterday I cut the binding for "Rock Island, Rock On" (a/k/a/ Rock Island Campfires) using about 1/2 yard of fabric. 

And after I got the binding sewed on, I began cutting strips from my scraps.  I have 5-1/2", 3", 2-1/2", 2", and 1-1/2" piles. Why 5-1/2"? you might be asking.  It's the size I use for "Mary's Triangles." They are really fun to make.  I'll put together a tutorial this week, so check back if you are intrigued ....

Still stripping, after all these years ......

Small progress, but it's a start.  I will be taking a box full of old magazines, some sewing room accessories, and several yards of fabric (previously counted out) for the freebie table at guild tomorrow.  I am definitely in a de-accessioning mode, can you tell?


Stash report this week:
     In this Week:            0.0 yards
     In year to Date:      157.25 yards
     Out this Week:           3.0 yards (.5 binding, 2.5 give-away)
     Out Year-to-Date:    130 yards
     Net Used 2014      -27.25 yards

Linking up with Judy at Patchwork Times.


Saturday, June 7, 2014

Sit and Sew Saturday

RIC, before quilting


After a week of Urban Renewal and Adventures in Cleaning,  not only can I SEE my sewing table, but it's clear enough to sew a binding on "Rock Island, Rock On" (a/k/a Rock Island Campfires).  Since I will be entering it in the Owensboro Quilt Guild show at the end of this month, it's critical I get that taken care of.


But look what's new!!!


Fat Quarter Tower


Bright and shiny and loaded with FQs.  Kinda messy at this point.  I need to figure out a fold that fits the space, but all those plastic bins are now empty as is the shelf they were on.  The bagged projects are temporarily going back on the shelf so that I can cut the binding for "Rock Island, Rock On."

So while I'd rather it be a Scrappy Saturday, I'll spend a bit of time cutting and sewing.  The binding handwork will be perfect company while watching golf this afternoon.


Have a great weekend, Everyone!

Friday, June 6, 2014

Happy Dance Friday

Grandson #1


You bet, I'm doing a happy dance today!

GS#1 turns 30 this weekend.  He's VP of a start-up energy company in DC. And he's still single  ... just sayin' ....

GS#2 is bringing a girl friend home to visit in July.  Should I start a new quilt???

GS#3 graduated middle school with all As and perfect attendance.  I'm sure his little sister did just as well -- she's heading off to middle school next year -- but no one tweeted about her .... sigh.

And the new cabinets fit perfectly under my layout table!


New/Old Cabinets from Habitat Re-Store

Dare we compare?

Before

A few more cabinets remain in the back of my van.  More stuff to be put away.  But ...

I am, indeed, a HAPPY GIRL!!

Linking up with Confessions of a Fabric Addict.